
Planning a Weaving Project
by Rene Corder Evans
As published in Creative Fibre, September 2022
Sometimes, in weaving, it seems that all the hard work is done before you actually sit down at your loom to weave, and you would be right in thinking this; it is! But developing a successful project is worth all the preparatory work.
Inspiration Where it all begins
Inspiration for your next weaving project is all around you – be open to new ideas, colour, textures and shapes. Keep a journal or scrap book of ideas, or store images you see as you go about life, in a folder on your phone for a handy reference. Magazines are a great source of inspiration. If you are flipping through a magazine and stop at a page, consider what it was about the page that made you stop. Was it a colour? A shape? Or what? Snap a picture or tear out the page (if you dare!).
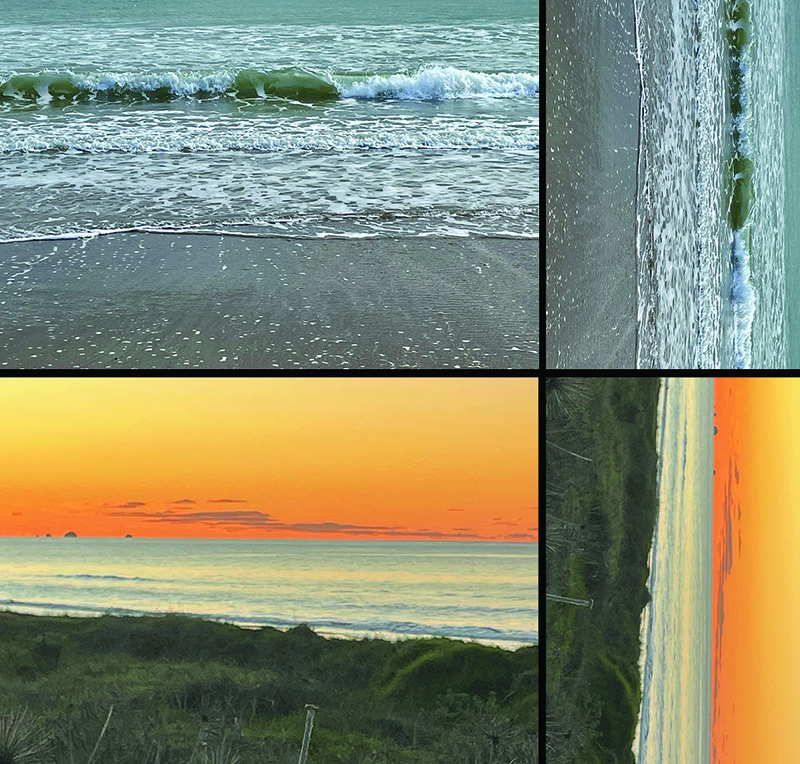
Consider turning the image on its side or upside down. Look at your own photos, a landscape picture turned on its side may become the perfect proportions for warp stripes. Or the magazine recipe picture turned upside down may become your colour inspiration for a painted warp. Rotating a page will also stop you from being influenced by the actual image. You may not want to weave your dinner!
Look for inspirations in:
• Nature: flowers, fruit, leaves, animals, birds, the ocean, hills, beaches, farmland.
• Design motifs: industrial design, furniture, ethnic designs, found objects.
• Historical and modern art, photographs, advertising.
• Weave structures: ethnic, commercial, or other hand woven textiles.
• Yarns.
• Everywhere!
Design Bringing the ideas to life
There are many elements to consider when designing a project, such as scale, proportion, balance, colour, movement. Creative Fibre offers two wonderful design courses mentored by Carol Oldfield. The practical knowledge learned in these courses could be invaluable in your future work. Some things to consider in the design process are:
• Determine the function of the piece. What style or mood do you wish to convey?
• Determine the scale and proportion.
• Consider texture. Consider colour. Sketch the piece and add colour, if it is for the body sketch it on a body.
• Analyse your design and don’t be afraid to change it.
• Choose yarns and make wrappings to emulate the wrap.
Technical Steps The project building blocks
• Decide on the sett (warp ends and weft picks per inch/cm) to be used.
• Calculate yarn requirements.
• Make a sample warp, a short warp at least 4”/10cm wide, or if you are confident with your design add enough warp to your calculations to weave a sample at the start. Cut off the sample(s) and wet finish as you would the project. Adjust sett as required. Allowing for samples also allows you to change the weft. What you thought would be the perfect weft may not be.
• Analyse your sample(s) – is it what you wanted? How could you change it for the better?
Sett will determine the hand or drape of your project
The sett or ends per inch (epi), or ends per centimetre (epc), and weft picks per inch (ppi) or picks per centimetre (ppc), will determine the hand/drape or density of the woven cloth. For new weavers, or weavers moving from a rigid heddle loom, the idea of being able to change the sett to any number can be confusing, but the choice of yarn sizes that can be used increases ten-fold.
The sett that you choose will depend very much on the intended use of the piece, the drape required and the yarn you plan to use. The sett would be very different if you wanted to weave a lightweight summer top compared to a table runner, even though the yarn may be the same. Or the sett of a table runner could be very different depending on if you are using a wool or a Tencel yarn.
How to determine sett
• The most accurate way is to weave samples and wet-finish them.
• Ruler test: Wind the yarn around a ruler (or piece of card) for an inch (or cm), count the number of wraps and divide by two. This will give the approximate sett for a medium firmness fabric woven balanced (warp and weft ends and picks per inch the same) in plain weave. Adjust +/- depending on the required hand, and the weave structure. For twill weaves increase by approximately 20% depending on how long the twill floats are.
• Shrinkage factor – take shrinkage into consideration when choosing the sett. You may want to reduce density of your sett if you are expecting reasonable shrinkage.
• Match yarns and sett to an existing project (either your own or from a magazine/book etc), look at the yds/lb or m/kg of the suggested yarn and the yarn type, and compare to the yarn you are planning on using.
• Sett charts – many yarn suppliers will have suggested sett listed on their online stores or ask your supplier for their suggested sett. Handwoven magazines often have sett charts.
• Always remember the intended function of the project and adjust the sett accordingly.
• Keep records to build up your own library of knowledge.
Reed Substitution Charts There is no limit to the sett you can choose
You may have a good array of reeds or you may only have one. Either way you can weave almost any sett on any reed.
You will find the reed size (in inches or cm) usually stamped into the metal on one end, or count the spaces for an inch or cm. I usually count for two inches or a few centimeters and divide just to make the count more accurate.
When I first started weaving, I thought I could only put one thread into each reed space (like a rigid heddle) so consequently wove a silk table runner at 12 epi when in fact 36 epi would have been more appropriate (that is another story). But then I was introduced to reed substitution charts (sometimes called reed sley charts).
• If you can, select a reed that works in multiples of the sett – eg for 24 epi, a 12 dent or 8 dent reed, rather than a 10.
• If the yarn is hairy or lumpy you are often better to go with a lower (wider space) dent reed.
To read a reed substitution chart look at the top row for the reed size you are using, look down the column to the required sett and then across to the most left-hand column for the sley order. Reed charts are found in many weaving books, magazines and online.
Click here to download imperial and metric charts.
Project Calculations How much yarn will the project need?
Before you start making your warp you will need to know how long to make it and how much yarn you will need (and if you have enough yarn). You also need to make sure you have enough weft material as well – how many of us have run out with still 10cm to go! There are several ways that you can calculate yarn requirement, from the back of the envelope method, an Excel spreadsheet or online sources. Download:
Project Calculation Sheet PDF (imperial and metric)
Project Calculation Sheet Excel (imperial and metric)
Project Record Sheet
Warp calculations considerations
• Finished length, with added allowances for samples, hems and shrinkage (this is the length to be woven). The general rule that I use is 10% shrinkage. However, if I am heavily fulling (felting) a project the shrinkage can be so great that it halves the length of the finished cloth.
• Allowance for take up – this allows for the fact that the warp threads actually bend up and over the weft threads – usually 10%, but could be higher for very thick weft threads.
• Allowance for fringes if applicable.
• Allowance for loom waste. Each loom is different and experienced weavers will know just how close to the end of a warp that they can weave, but a good general rule is the distance between the front and back beams.
• Add all the above items together and multiply by the width that is being woven and the warp sett. This will give you the number of metres or yards needed. Then using the information you have about your yarn length to weight ratio, ie how many yds/lb or m/kg, you can determine how many cones or balls of yarn are required.
• If you don’t know the yds/lb or m/kg of a yarn you could use a McMorran Balance or make a balance: https://handwovenmagazine.com/mcmorran-yarn-balance/
Weft Calculations
• Finished width plus allowances for draw-in, take-up and shrinkage, multiplied by the length to be woven and the weft sett (picks per inch or cm), will give the number of metres or yards of weft yarn needed.
Finally – you are ready to make your warp, thread your loom and weave!